You lost me at step 1. White is NOT the first thing you should find in fact not all white colors are created equal so by telling people to use "something white" which in fact may not be accurate will cause all kinds of headaches later.
No, don't use white, that is what an amateur would do, be a pro and shoot a 12% gray card, forget 18%, that value was used a long time ago with the print press and today we use monitors and LED and a whole other complex set of technology so the new 18% is 12%. Calibrate your white balance first by dialing in middle gray and THEN tune your white balance to get accurate color.
By using just any white color you find in the environment you are essentially introducing bias into your color matrix which. Calibrate correctly from the start and you will have much better data to grade.
Quote from: rainless on April 05, 2014, 05:01:57 PM
(DISCLAIMER: This post is going to take a LOT of time to put together. Maybe an entire month... but I'll try to make it worth it.)
I've been really sort of BAFFLED by a lot of really well-known, professional photographers as the stumble and bumble their way through attempting to get great images out of RAW video. I'm talking about people like Dave Dugdale ( https://www.youtube.com/watch?v=rAgPaiLgeE4 ) and Phillip Bloom ( http://vimeo.com/73259922 ).
People with a LOT more money and experience than I have.
I look at these videos and think: "What the hell are these guys doing?"
Dave Dugdale even says he spent half an hour trying to color what looked, to me at least, like a pretty straightforward shot (it's in the video above). He then asked a professional colorist to look at it and that guy nailed it in two minutes.
My background is in videography and post-production editing. I've been doing that for 17 years and I've only been doing photography professionally for about 8 years. So I would've given guys like Bloom and Dugdale every advantage in the world over me when it comes to RAW video because it plays to all their strengths as professional photographers (who also do video). Instead, what we have is akin to Zoolander.
So... without further adieu... I'm going to write a guide to Color Grading, Color Correcting, and breathing life into your RAW videos.
Before I get into in-depth Camera Raw/After Effects stuff, I figured I'd just throw a simple ground rules out there.
1. Color grading starts with White Balancing.
Forget about how much blue, magenta, or green you need in each image. The first thing you need to do for your editing software is help it define what WHITE is. For Camera RAW this is simple: Just select the White Balance tool and click on something "white" in the image. DONE. It will neutralize, not only whatever you click on, but the entire image. You can start building up colors from there. If there is nothing white around when you're shooting video, it could be helpful to have a white card somewhere in the first frame so you can use that to balance and then take it from there.
2. Find out which color is overdone
Easiest way to do this is, again, with a white card... or somebody's white shirt, the white of someone's eyes. Just LOOK at the image and see what color is overpowering your shot. White balancing will automatically minimize that color, but it's important to at least identify what that color was so that you can go through and find points that were missed or kick that color back up if it gets knocked down too-far.
3. Sit WAY back from your image or video and compare the colors in the image with the colors around you
I like to do this on a laptop... maybe in the park. Your images should look as close to the real world as possible. (Unless you're making a sci-fi movie... and even then...)
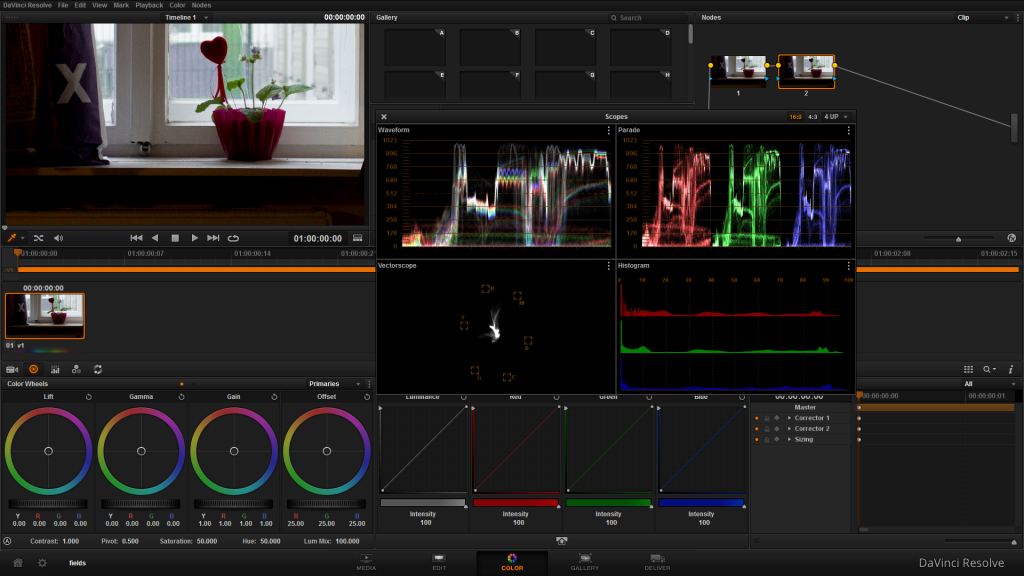
Here's the first image we'll be working with. This is just something I threw together in a few minutes just to explain the process. This was a crop mode .mlv from my 600D at 1280x720, 23.976 frames a second. This was converted to DNGs using MLVRawviewer, and then imported into After Effects (I'm in Windows 7). There I applied white balancing and minor corrections as outlined above. Then I exported an .mov and opened it in Resolve.
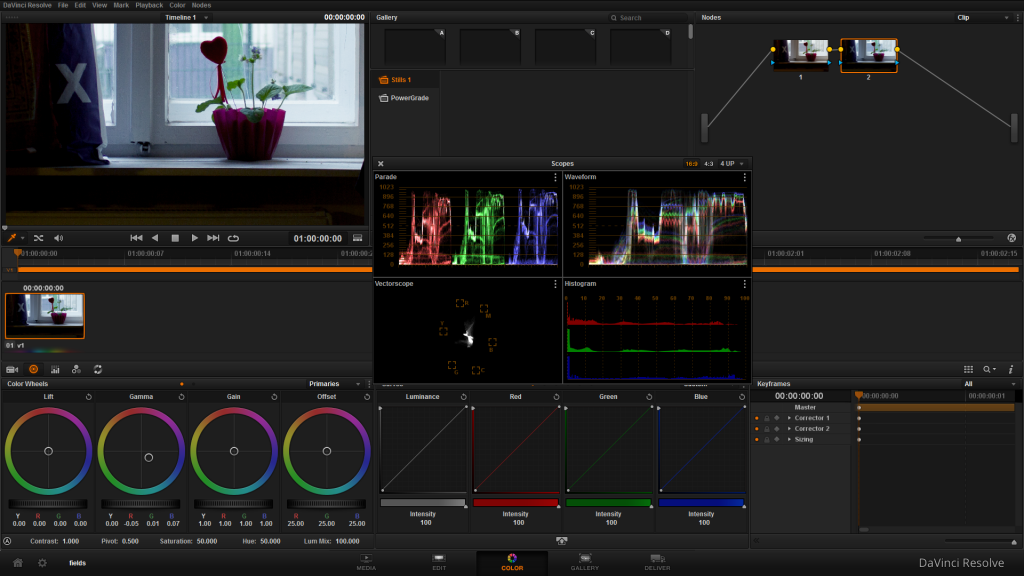
Here I should talk a bit about "warm" and "cool" colors. For simplicity's sake we'll just say that I love the way the flower looks, but the rest of this image is too warm because there's too much red. Without any effort at all (and in the most ham-handed "Your ass is blind if you can't see the difference) way possible, I just grabbed a color wheel and moved the gamma closer to the blue.
What you have now is a much "cooler" (more blue) image that more faithfully reflects the chilly morning that I recorded it. But also the flower no longer looks good.
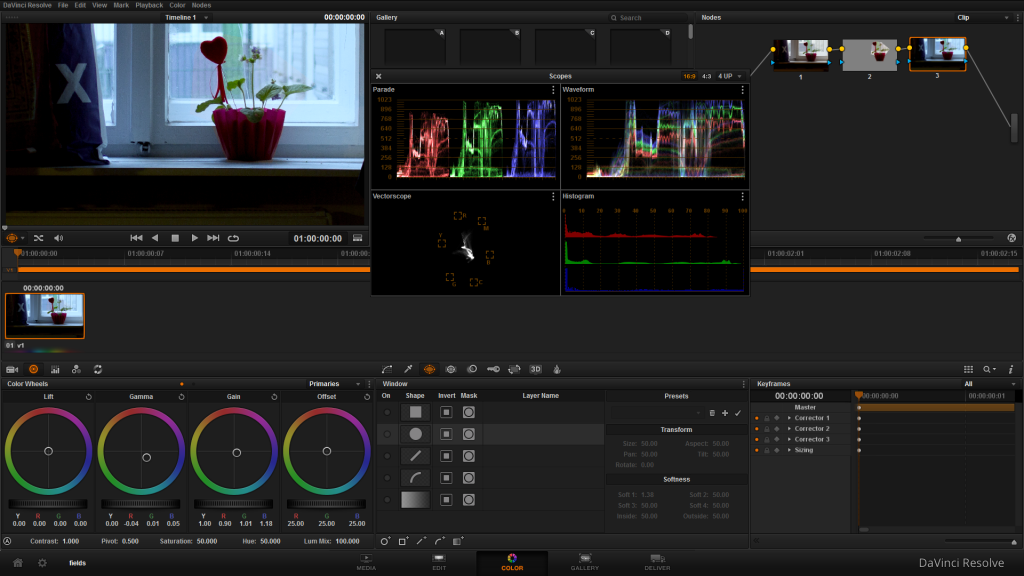
So I just added another node with a mask over the flower (best, mask, system, EVERRRR!) and boosted only the red of the flower (I could've also masked out the flower and done the blue there.) As you can see it's not a very detailed mask at all. But you've got the cool blue in the rest of the image and the red of the flower is back.
And the whole thing took ten seconds to do.
Now look at the scopes. I know, if you're not familiar with looking at this sort of thing then they probably look like something out of The REAL Ghostbusters. (Handing out points to anyone who knows why they were called that...) A good way to think of it is those solid lines you see at the bottom, middle, and top of the scopes. The bottom would be the shadowy parts of the image. That solid line at the bottom should be are ZERO (0). If it's higher than that then you need to lower it. Most of the time, when you're shooting raw video on these Canons... it will ABSOLUTELY be higher than zero. But that's relatively easy to fix. You just spin the first "Color Wheel" in Resolve. To control the midtones you use the second wheel and to control the highlights you use the third wheel. I'm still working on my Kickstarter video so I don't have time to show you how that's done... but I did find a guy who is (sadly) less busy than I am... and HE had the time!
Now you can tell in our flower pic that the shadows are fine and the midtones look okay... but the highlights are clipping! What this means is that if you upload or send your video somewhere COMPLETE AND UTTER CHAOS will ensue (like when that guy that did the Africa video who got mad at me uploaded his video to youtube and the white stripes on the zebra were suddenly yellow). All you have to do is bring the highlights BACK down to earth and you're back in business.
(Have to get back to work. Be back in a bit.)


