Menu

Show posts

This section allows you to view all posts made by this member. Note that you can only see posts made in areas you currently have access to.

Show posts Menu
Topics - ted ramasola

#2
This topic has been moved to [camera-specific discussion].

http://www.magiclantern.fm/forum/index.php?topic=11693.0
#4
For those who missed the blood moon eclipse, here's a "summarized" version of the entire event. It was so cold but it was worth it. Forgive the dead pixels in my sensor.
Had to do a "mcgyver" to my cam, sticking a 80-200mm nikon lens on a nikon mount 2x converter onto a canon mount 2x converter onto my old canon camera. This was from around 2AM to 4AM.

#5
Used FPS Override for clean low light shots and timelapse.
5D mkII, MLV Raw.


#6
Camera-specific Development / Canon 5D Mark II / 5D2
March 27, 2014, 08:34:06 AM
Guide to Installing ML on 5D mkII for shooting with MLV Raw Video with Sound
As of March 27, 2014.

---NOTE: content for this post still being updated-----


A.)-What You Need
1. Your 5D2 Camera
2. Computer
3. Connection to the internet for downloading needed firmware and apps
4. CF Card, 1000X recommended for Raw video.
5. USB Card Reader, USB3.0 UDMA7 Compliant recommended.
Note#1 on Using USB Card Reader
Some CF cards like the affordable KomputerBay 64gig 1000X and higher, are known to become corrupted and is not compatible with card readers that are USB2.0.
Use USB3.0 UDMA7 compatible readers.


D.)- Installing ML on Your Camera


Installation:
1) Format the card from the camera.
2) Make sure you are running Canon firmware 2.1.2.
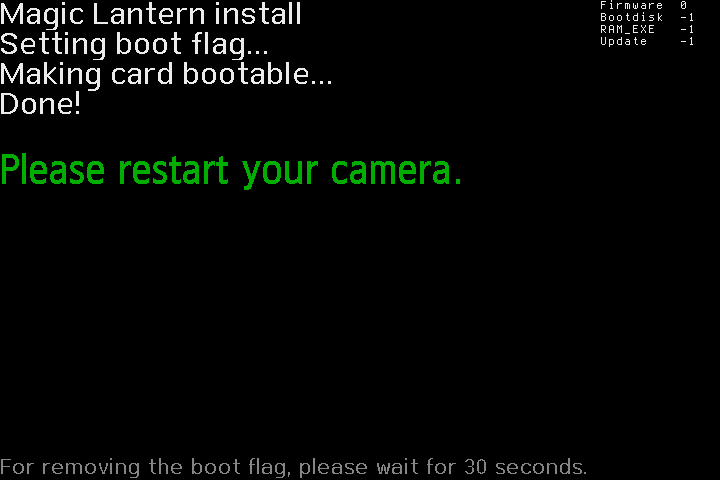
3) Copy ML files on the card and run Firmware Update.

Uninstallation:
1) Run Firmware Update from your ML card.
2) Follow the instructions.

E.)-Updating from ML Nightly Builds
1. With your CF card in your Card reader, copy the latest Nightly Build file you have unzipped earlier to your CF card, you will have 2 files, ML folder and Autoexec.bin. Copy both over the old ones. (No need to include the .fir file)
2. Place CF back into Camera, Turn ON, press live view, press trash bin icon to bring up ML menu, if you see the Magic Lantern info screen, just press trash bin again, you can navigate this menu via joystick(multicontroller), control dials, set button and the picture style button to access sub menus in ML.
Note#5  Accessing sub menus when in ML menu.
Pressing the Picture Style is same as Q button on other models.


F.)-Load Modules You Need
1.  With Camera ON and in Liveview, press Trash Bin to bring up ML menu,
2. Using the joystick or the front scroll wheel navigate to the MODULES Tab, then using the joystick or the rear dial/scroll wheel select the following mdules by pressing SET. You will see an ON,WILL LOAD.
    For Raw Video recording: (essentials)
   file_man
   mlv_play
   mlv_rec
   mlv_snd
   pic_view
   raw_rec (this is version one of raw and should not be used together with mlv_rec, choose one)
   For advanced stills shooting:(see relevant stills threads as I'll focus more on video shooting)
3. Reboot your camera, when ON, go back to ML menu and confirm in the Modules Tab the Modules you loaded, they will now have an OK beside them.
Later on, when you have learned more about ML, you can load and unload additional modules this way.
Note#6 Some Modules you have Loaded Still Need to be Turned ON
After you have confirmed in the Modules Tab, Modules like MLV Sound(mlv_snd.mo) and MLV Raw Video(mlv_rec.mo) has to be toggled on in the respective Raw Video and Sound Tabs. See Recommended settings part G/2, below.


G.)-Recommended Setting for your Camera (Shooting with MLV+Sound)

1. Canon Menu:
  -1st Cam Tab
   Peripheral illum.correct > disable
  -2nd Cam Tab
   color space > adobe rgb
  -2nd Play Tab   
    highlight alert > disable
    image jump > 1 image
  -1st Wrench Tab
   Auto power Off >OFF (or  8 min or 15 min depending on CF card/ 8min-32 gig /15min-64gig)
  -2nd Wrench TAB
   Liveview func/movie set> LV func.setting > Stills+movie / Screen setting > movie display
   Set correct Date and Time
  -Cfn I   
    Exposure > iso expansion > ON
  -Cfn II
   Hi ISO speed noise reduction> Disable
   Highlight tone priority> Disable
   Auto lighting optimizer> Disable

2. Magic Lantern Menu:
  -Audio Tab
   MLV Sound>ON  48khz default
   (pressing pic style then top scroll wheel will let you choose 48/44.1/22/11/8 khz)
   Headphone Mon.>ON (If you need monitoring use av cable with rca to phone jack adapter or a sesscom cable)
Note#7 MLV Sound
When MLV Sound is ON, a separate WAV file is generated at the framerate determined by your FPS setting in Canon Menu.
When FPS Override is used, only the framerate of raw video is affected, the WAV file will remain either 24fps or 30fps depending on the FPS setting in canon menu.
It is not possible to playback mlv sound in-camera.


  -Overlay Tab
   Global Draw.ON (this is the main "switch" for GD, there is another one in raw video sub menu)
   I recommend to turn OFF all other entries when shooting raw.


  -Movie Tab
   FPS override>23.976 (optimize for Exact FPS) This is necessary if you will shoot in Crop mode (link)
Note#8 FPS Over ride uses.
When recording in 3X crop mode, the default framerate is 30fps regardless of your setting in canon menu,
so activate FPS Override and set to 23.976 or 25, or 24 depending on your use.
It is important that you set this OFF when you want sound to be recorded when using native h264 mov.
Your hint is the absence of the audio meters when this is engaged.
In MLV RAW, a separate WAV file is recorded even if FPS override is used. See Audio Tab Note#7 above.

   Raw video (MLV)>ON (after pressing set to turn ON press  pic styles for more options)
   >Raw Video(MLV) sub menu
   Resolution>1728x972 (see table of what is currently continuous at different settings) http://www.magiclantern.fm/forum/index.php?topic=11205.msg108936#msg108936
   Aspect Ratio>16:9 (see table of what is currently continuous at different settings)
   Global Draw>ALLOW
   Frame Skipping>OFF
   Preview>Auto
   Status when recording>Icon
   Extra Hacks>ON
   Fix Black level>OFF (turning this ON will give a pinkish shade to your raw frames-as of May15 nightly)
   Leave others at default until you have familiarized yourself shooting ML.
   >Movie Tweaks Sub Menu (these usually paertain to h264 recording)
   Movie Restart>ON (allows you unsupervised continuous recording in h264, when the 4gig limit is reached, recording restarts again, there is a 1second gap)

  -Display Tab
   LV DIGIC Peaking>Slightly sharper (Use this instead of the old peaking method, faster, more accurate)
   Advanced Settings Sub menu
   >Screen Layout>4:3 display,auto

  -Modules Tab
   See Part F.

  -Prefs Tab
   Config files sub menu
   >Config Autosave>ON
   Warnings for bad settings sub menu
   >Mode warning>other than M (warns you if you move the dial from Manual)

  -Debug Tab
   Modules debug sub menu
   >Load modules after crash>ON

After making these recommended settings, its advisable to do a camera reboot so ML can save the settings before beginning to shoot.

H.)-Shooting Raw in 1X mode or Normal mode
1. The SET button starts and stops recording for both raw video and h264.
2. Shooting in 30P is possible when set in Canon menu but only short record times is possible for bigger resolutions. (see table of what is currently continuous at different settings)
Tip: Since picture profiles have no burned in effect in RAW video recording, I increase sharpness in my pic styles to aid in focusing, in addition to using DIGIC Peaking.

I.)-Shooting Raw in 3X Crop mode
1. To activate 3X crop mode press magnify button once (5X), pressing it twice(10X) has no effect and is useful for checking focus only. So, to be clear, its not 5x crop mode, its 3X crop mode using 5X magnify.
2. After pressing magnify button, go to ML menu>Raw Video sub menu. You can now select resolutions higher than 18xx.  Highest is 2144x1076  16:9 but only for a few seconds.
(see table of what is currently continuous at different settings) http://www.magiclantern.fm/forum/index.php?topic=11205.msg108936#msg108936
3. Activate FPS Override as the camera defaults to 30P in crop mode even if 24P is selected in canon menu.
In some higher resolutions or slow cards it might be necessary to use slower  FPS to achieve longer record times.
4. Viewing and framing in crop mode is challenging. There are different option in RAW Video sub menu>preview> (Auto/Canon/ML Grayscale) Default is AUTO
Auto
Canon-Gives you the "normal" Canon 5X magnification, real time color feedback but inaccurate framing.
ML Grayscale-Gives you proper near accurate framing but grayscale/low resolution/slow feed back.
5. Color viewing and slightly better preview is available for crop mode by half pressing the shutter.  You can turn ON Sticky half Shutter in ML Menu>Prefs>Misc key settings>Sticky HalfShutter>ON.
BUT this conflicts with the SET button for start and stop of recording. Workaround is, Start recording/half press to view in color, when your about to stop half press again to disengage half shutter/Stop Recording.
J.)-Viewing your Raw Files In-Camera
1. In ML Menu, go to DEBUG TAB, scroll down to FILE MANAGER,press SET,Navigate to the DCIM folder of your CF card, click SET, find and select the file you want to view.
2. Choose VIEW to playback file.
3. Press Trash Bin to activate playback controls and options. Use Scroll Dial to select option and press SET.
Note#9 Files you will expect to find in your CF Card when shooting RAW.
xxx-xxxx.MLV - Raw File containing both DNG and WAV.
xxx-xxxx.Mxx - Part of the MLV file generated if recording exceeds 4gig.
xxx-xxxx.IDX - file generated after you viewed an MLV or an Mxx file in file manager.
MLV_REC.TMP - preallocation file created when you RESERVE CARD SPACE>ON in the RAW Video submenu.
xxx-xxxx.RAW - Raw file ver.1 containing DNG frames (no audio)
xxx-xxxx.Rxx - Part of the RAW file generated if recording exceeds 4gig.
xxx-xxxx.MOV - h264 Video file
xxx-xxxx.THM - Thumbnail of the MOV file.
Note#10 Native H264 mov or JPG files cannot be played back via file manager viewer.
To View native H264 MOV or JPG Stills make sure that RAW Video(MLV) is OFF in ml menu MOVIE TAB.
Use Play Button to view MOV files.

K.)-Extracting your DNGs and WAV files.
  Windows:
   For converting MLV files to 12bit or 16bit CDNG: http://www.magiclantern.fm/forum/index.php?topic=5618.0
   For converting MLV Files to 14bit DNG: http://www.magiclantern.fm/forum/index.php?topic=10198.msg98334;topicseen#msg98334
  Mac:
   For converting RAW files to CDNG: http://www.magiclantern.fm/forum/index.php?topic=6218.0

L.)-Editing the DNG/CDNG & WAV files.

Da Vinci Resolve 10 Lite (Free Application for grading and simple editing) : http://www.blackmagicdesign.com/products/davinciresolve

More discussions on Post Workflow here: http://www.magiclantern.fm/forum/index.php?board=54

---NOTE: content for this post is constantly being updated-----
#7
General Help Q&A / MOVED: What would happen if?
March 23, 2014, 04:58:26 PM
This topic has been moved to [General Chat].

http://www.magiclantern.fm/forum/index.php?topic=11138.0
#8
Tragic Lantern / 7D 2512 x 1068 video at 17fps test.
March 03, 2014, 07:06:09 AM
At 2512 x 1068 and using a 1000x CF, the 7D can still record continuously with sound but in my tests only at 17FPS. Is is useful? I believe so for certain applications or situations.

I remembered that back in the day our business shot events using 8mm at 16fps. The GoPro Hero3 can do 4K at 15fps. So at 17fps it must still be ok.

On the res chart flutes, this setting by far is the cleanest of the crop modes resolving past 1000 horizontal while 2048 x 930 is at past 800.

For normal human movement at a certain distances the motion is still ok, here's a short test. Watch it at full res.

#9
The Canon 7D with Magic Lantern raw video+sound is now maturing as a reliable raw camera, this is how good its 2048 x 930 crop mode video looks like. At 23.976fps with no VAF filter.
At this resolution, the 7D can record continuously at 23.976 to fill up a 1000x CF card. Sound is in sync with no drift.

#10
Testing the 7D for slo-mo with MLV+SND.
Buffer-1 or 2

Some of the resolutions that go continuous are:
1728 x 516  2.39:1 at 48 fps
1664 x 506  2.35:1 at 50 fps
1408 x 566  16:9 at 50fps
1344 x 540 at 16:9 at 50 fps

Notes:
1. Continuous shooting is possible at this resolution with sound.
Just like the 5DmkII, audio is advanced 2 frames and has extra frames of 7-8. After a nudge audio is perfectly synced with no drifting.

2. To achieve high frame rate, canon menu must be set to 1280x720 60fps.

3. Use FPS over ride in ML menu for 50FPS and lower.  48 or 96 shutter speed depending on amount of blur you want.

4. The 50/60fps video captured is squeezed and framing is not correct.
   ML menu tip will show you have to resize 1.4 to achieve correct 16:9 ratio of, for example, 1344 x 756 in post, the aspect ratio options will show 1344 x 540.
   However, using a chart and some guide lines, resizing to 1.4 is still not enough.
   You have to stretch height further and cropping the top and bottom to achieve proper proportion. Resize should be approx, 1.65. (edit 1.66, thanks to larrycafe)

Maybe a dev can edit the tool tip to reflect these.
Either correct the cropping of the video or change the info/tip to use 1.66 instead of 1.4 stretch.

Conforming the 50/60 FPS video to 23.976 in post gives a smooth slow motion.
#11
Before you have to pick 2 from GOOD, FAST, CHEAP, Now you can actually have GOOD, FAST and FREE.  :D

Tested the new resolve 10 beta and so far so great. It could possibly change the way we deal with raw, no more roundtrips as this version is now an NLE.

See a couple of shots I compared processed by 9 and 10.


See enlarged; http://www.ramasolaproductions.com/resources/resolve+10+fix+ducks4.jpg


See enlarged: http://www.ramasolaproductions.com/resources/resolve+10+fix+pond+1.jpg
#12
Since 3X crop is sharper and very minimal aliasing and moire I went out and tried to see whats it like to shoot entirely in crop mode.
Used a Tokina 11-16 as a 33-48 "normal" lens and an 80-200mm nikkor as a very long 240-600mm.

Also, for this piece I removed the VAF filter to get optimum sharpness.

CF Cards: KomputerBay 64gig 1000X

#13
Took the 5d2 for an evening stroll and try to get use to the raw video work flow. Used only one lens, a 24-105 f4L.

Had a couple of Komputerbay 1000X 64gig cards.

Also had a Mosaic VAF5D2 filter used.

Conformed and slight grade in Resolve lite finishing in Edius.


1080P version in Youtube:

http://www.youtube.com/watch?v=tlPqGIkEpPU&feature=youtu.be
#14
Their first batch got sold out already, but hopefully I will be able to test one by end of the week or early next week.
I'll keep you guys posted how it goes on the 5D mkII and 7D and hopefully a 5D mkIII.


http://www.amazon.com/KOMPUTERBAY-256GB-Professional-COMPACT-Extreme/dp/B00EM9I6II/ref=sr_sp-btf_title_1_13?s=electronics&ie=UTF8&qid=1376990373&sr=1-13&keywords=cf+1200x
#15
Since my initial tests on komputerbay 128 gig card 1000x and 1050x is indicating problems with ML and .FIR files,

is anyone here using 128 cards of other brands NOT komputerBay with success on the 5DmkII ?

or perhaps of a lower speed?

Also here is a link to a thread i started on tests I'm doing on the komputerbay 128gig 1000x and 1050x.

http://www.magiclantern.fm/forum/index.php?topic=7302.msg61604#msg61604
#16
5D mkII users ONLY please.

I am starting this thread to post test results on the compatibility of ML firmware and the high capacity 128 gig CF cards.

I am currently testing cards sent by KomputerBay techsupport to see issues and solutions on their 128 gig cards on 5dmkII.

Both are UDMA7 128.

one is version2 1000X
other is 1050X

Those who have these cards and are using it on 5D mkII can also share their experience on this thread, hopefully KB techsupport will also chime in and note our findings.
#18
Share Your Videos / The Way of the Foot and Fist
January 29, 2013, 07:53:36 AM

This is the story of Master John Monroe and the Korean Taekwondo Institute which he founded 20 years ago.
It is a glimpse into the lives and personal struggles of the people behind Korean Taekwondo Institute, the students, the teachers and how they show that Teakwondo is more than just kicking and punching.

Filmed and edited by:
Ted Ramasola
Information on the technical aspects of this production, cameras, sound, and how magic lantern makes this possible etc. behind the scenes photos are posted here:
http://www.ramasolaproductions.com/